Sometimes an offset just completes a design, but they can look a little daunting.
You can totally do this in five steps - less if you don't need the gap. (That little gap is so handy when you want a glitter offset so we'll look at both.)
Pin this handy cheat sheet for later:

STEP ONE:
Pick your font and Type of out what you would like to offset. A little thicker works better and if it's print, leave a little more space between the letters to keep from overlapping.
Note the Position of your word(s). I like to start at X 1.0, Y 1.0 for consistency but anywhere on the mat will work.
Once you're happy with how it looks, select your word(s) and click Weld on the bottom right.

STEP TWO:
Select your word(s) and click Duplicate on the upper right side. Now you have two!
Select the new layer on the right hand menu and change the Color (just something that will stand out so you can tell the difference.)
Position the new layer directly on top the original layer. Short cut - if you did X 1.0, Y 1.0 like me you can just type those in on the top bar under position and it will automatically move it.
Move the new layer to the bottom by clicking Arrange on the top menu and Move To Back. Now all you should see on the screen is the original layer.

STEP THREE:
Make sure your now bottom layer is selected by clicking on it in the right hand menu. Then Move it right and down by either using the arrows on your keyboard or clicking and dragging it with your mouse.
You should be able to see the bottom layer peeking out now. Move it around until it looks good. Remember, this layer is the gap so make it as small or big as you want.
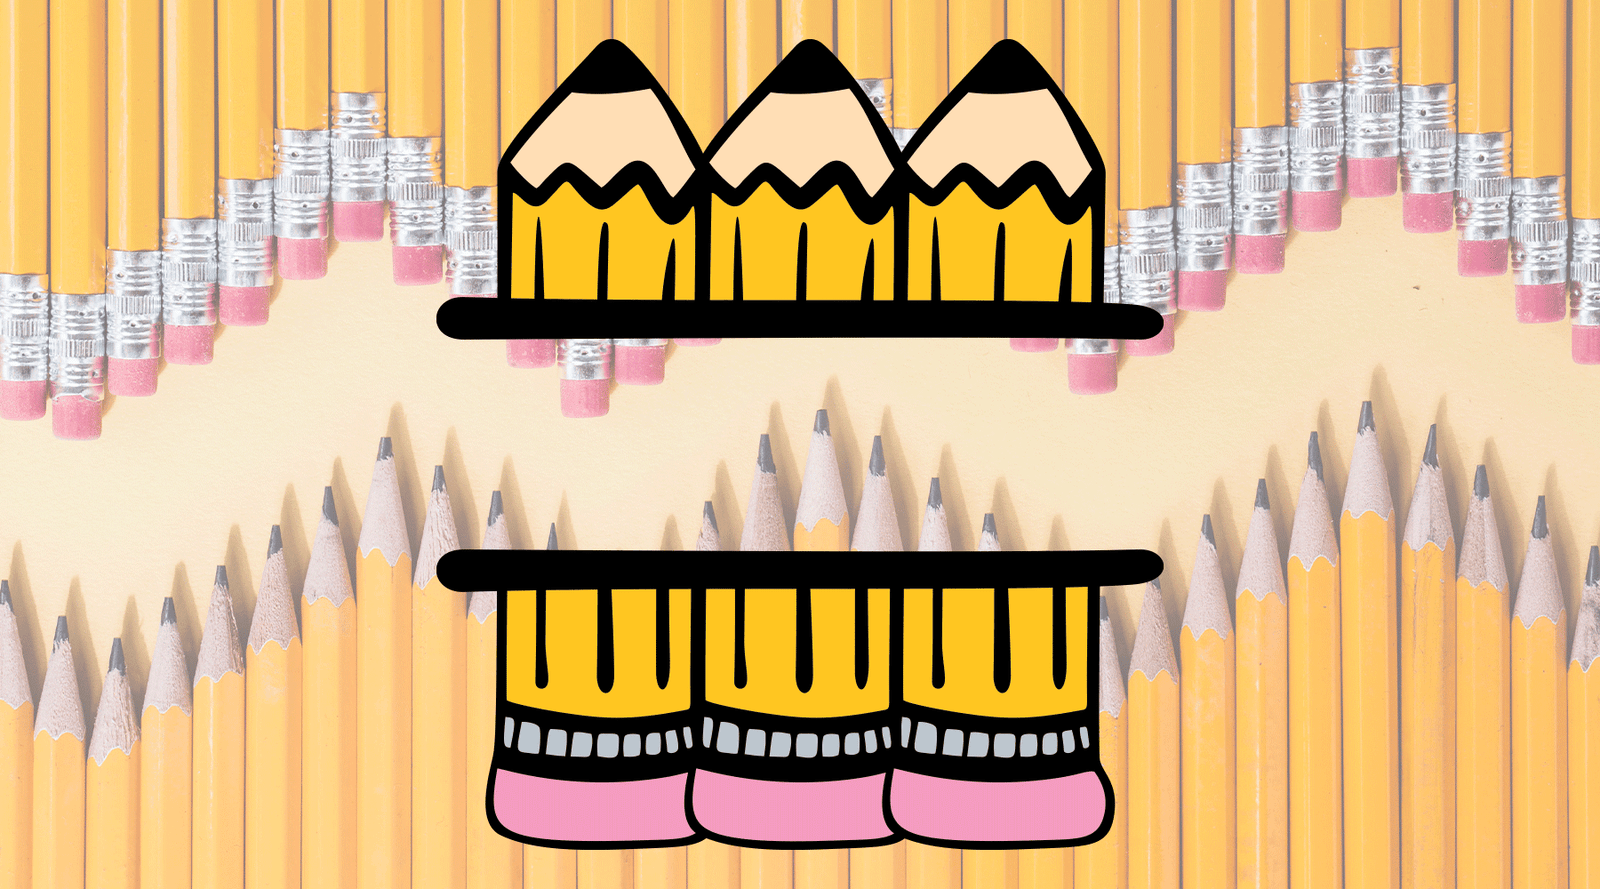
Now Repeat Step Two with a new layer. This time use the bottom layer to duplicate and position the third layer. Then arrange it to the bottom and move it around until you get something like this:

STEP FOUR:
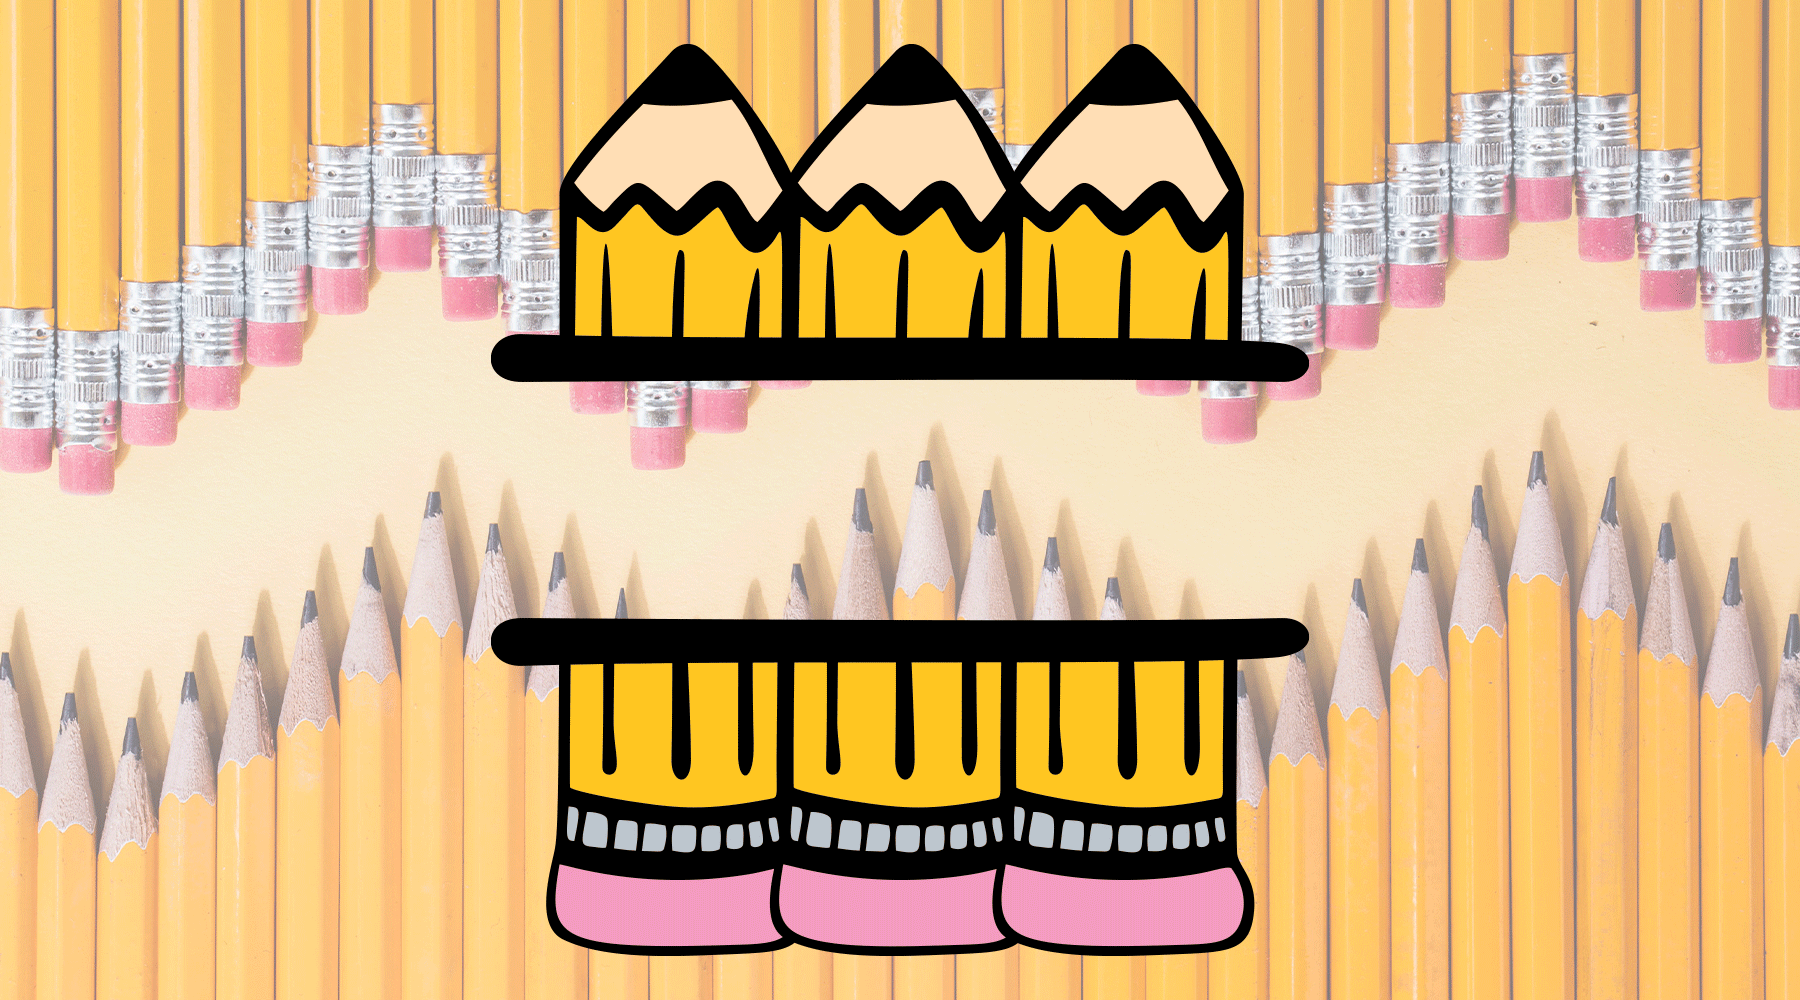
On the right side menu, your duplicate layers should be the second and third listed. Select both of those and click Slice on the bottom right.
You should see your original layer and four more pop up (two for each color). Delete the first 3 listed, which leaves you with just the outer offset.
You can Move your new offset to the bottom to make it look prettier.
Here's what it will look like right after you slice:

STEP FIVE:
If you want Two Different Colors for your word(s) and offset, then that's it - all Done! You can click Make It and cut like usual.
If you would like your word(s) and offset to be One Color, select both layers and Weld. After they're welded together, you're good to click Make It and cut like usual.

Hooray! You are ready to go offset all the things now!
If you have any questions, suggestions or would like to share a picture of your new project, please leave a comment below.
Thank you so much for reading along and Happy Crafting!